How to Identify a Quality Remanufactured Engine: 5 Critical Inspection Points
Last March, a fleet manager in Texas—we'll call him Dave—installed 12 remanufactured engines across his delivery vans. Six months later, four of them had failed, costing him $28,000 in replacements and downtime. The worst part? Every single failure was preventable. Dave had skipped the inspection process because the supplier "seemed reputable." He wasn't wrong about the supplier's marketing. He was wrong about what constitutes proof of engine quality.
The reality is more nuanced. A properly remanufactured engine saves you 30 to 50 percent compared to buying new, and research published in the Journal of Cleaner Production shows these engines carry only a 5 percent failure rate within the first three years—half the failure rate of some new engine categories. But those numbers only hold when the remanufacturing process was executed correctly. A poorly rebuilt engine dressed up to look new will cost you far more than the money you saved upfront.
If you're a procurement manager, fleet operator, or distributor sourcing engine assemblies, this guide walks you through five non-negotiable inspection checkpoints that separate a genuinely remanufactured engine from a cosmetically repaired one. We'll cover compression testing, block integrity, crankshaft and bearing condition, cylinder head assessment, and documentation—giving you a practical framework you can apply before signing that purchase order.
Key Takeaways - Compression testing is your fastest diagnostic: gasoline engines should read 130–180 psi with under 15% cylinder variation; diesels should hit 350–425 psi - Cylinder block integrity requires non-destructive testing (magnetic particle or dye penetrant) to catch cracks invisible to the naked eye - Crankshaft journal taper must stay under 0.001" and bearing clearance between 0.001–0.003" for proper oil film maintenance - Cylinder head flatness within 0.003" and verified valve seat sealing prevent premature combustion leaks - Documentation—process records, test reports, ISO 9001/IATF 16949 certification, and a minimum 12-month warranty—is your financial safety net

1. Compression Testing: The First Line of Defense
If you only have time for one test, make it a compression test. It tells you more about internal engine condition in ten minutes than any visual inspection ever will. This is the cornerstone of any serious engine inspection routine.
Standard Compression Values
For gasoline engines, healthy cylinders typically produce 130 to 180 psi during a cranking compression test. Diesel engines operate at substantially higher pressures—350 to 425 psi is the normal range for most commercial diesel platforms. These numbers aren't arbitrary; they reflect the compression ratio the engine was designed around, and any significant deviation signals a sealing problem.
But here's what most procurement guides won't tell you: the absolute psi matters less than the spread between cylinders. The golden rule is that cylinder-to-cylinder variation should not exceed 10 to 15 percent of the highest reading. If your highest cylinder reads 160 psi, your lowest should not fall below 136 psi. A single cylinder dropping to 110 psi while the rest hold steady at 155? That's a red flag pointing to a burnt valve, broken piston ring, or localized head gasket failure.
Dry vs. Wet Compression Testing
This is where the diagnostic process gets interesting. A dry compression test measures cylinder pressure as-is. If a cylinder reads low, you follow up with a wet test: squirt one to two tablespoons of clean engine oil into the cylinder through the spark plug hole and retest.
Here's the diagnostic logic:
- Readings rise significantly after oil is added → worn piston rings or cylinder wall scoring. The oil temporarily seals the gap between the rings and the cylinder wall.
- Readings stay the same → the problem is upstream. Think leaking valves, damaged valve seats, or a blown head gasket. Oil doesn't reach those sealing surfaces.
A quality remanufactured engine should pass both tests cleanly—consistent dry readings across all cylinders and no significant improvement on the wet test, because the rings and cylinder walls should already be properly seated and sealed.
How to Run the Test Yourself
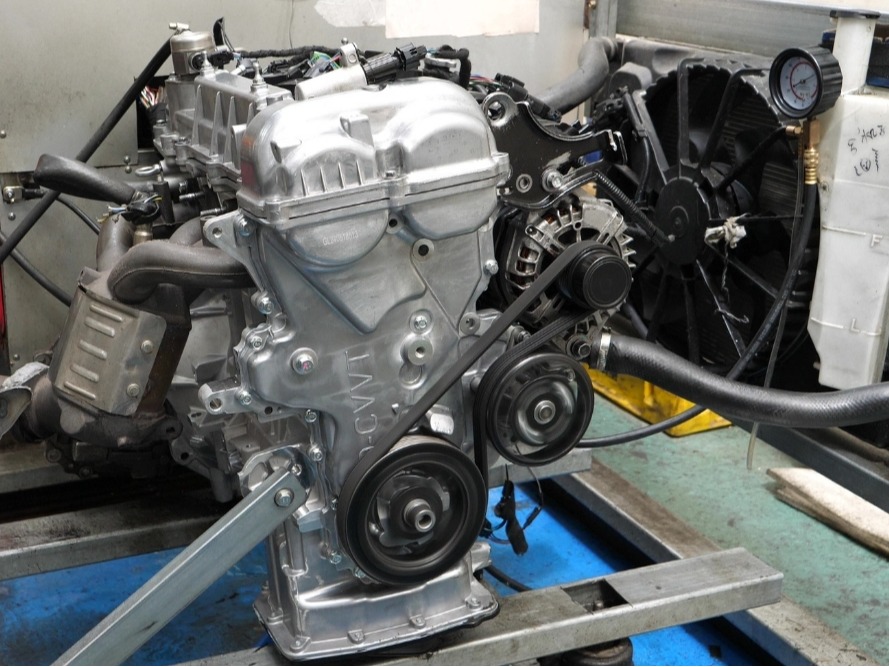
You don't need a full shop to do this. A calibrated compression gauge costs $40–$80 and takes about 20 minutes per engine:
- Bring the engine to operating temperature (warm metal expands and seats properly).
- Remove all spark plugs (or glow plugs on diesels) to reduce cranking resistance.
- Disable the ignition and fuel systems to prevent fire hazards.
- Hold the throttle wide open to maximize air intake.
- Screw the gauge into one cylinder, crank the engine for 4–6 revolutions, and record the highest stable reading.
- Repeat for every cylinder and compare the results.
One more note: always use a charged battery and consistent cranking speed. A weak battery produces artificially low readings across all cylinders, which can mask a single bad cylinder.
Want to see what properly tested engines look like before they ship? Browse our engine catalog for spec sheets and test data on every unit.

2. Cylinder Block Integrity: Looking Beyond the Surface
A clean, painted engine block looks great in a product photo. It tells you exactly nothing about structural integrity. The cylinder block is the foundation of the entire engine—if it has hidden flaws, no amount of precision machining elsewhere will save you.
Crack Detection: What You Can't See Will Hurt You
Cylinder block cracks are the silent killers of remanufactured engines. They often remain invisible until the engine heat-cycles dozens of times and thermal stress widens them enough to leak coolant or oil. By then, you've already installed the engine, and the failure is catastrophic.
Two non-destructive testing (NDT) methods are standard in professional remanufacturing:
- Magnetic Particle Testing (Magnaflux): Used on cast iron blocks. The block is magnetized, and iron particles are applied to the surface. Any surface or near-surface crack disrupts the magnetic field, causing particles to cluster along the crack line. It's fast, reliable, and catches cracks as thin as a human hair.
- Dye Penetrant Testing: Used on aluminum blocks, which cannot be magnetized. A fluorescent or visible dye is sprayed onto the surface, allowed to seep into any cracks via capillary action, then wiped clean. A developer draws the trapped dye back out, making cracks visible under UV light.
Any reputable remanufacturer should be able to confirm which NDT method was used and provide documentation. If they can't, walk away.
Bore Measurement: Taper and Out-of-Round
Cylinder walls wear unevenly over time. The top of the bore—where combustion pressure is highest and rings travel the least—wears differently than the middle. This creates taper. Meanwhile, piston side-loading causes more wear on one axis than another, creating out-of-round (ovality).
A quality remanufactured engine should have cylinders that have been either honed to a consistent finish or bored oversize with new pistons fitted. Measure with a bore micrometer or dial bore gauge at three points (top, middle, bottom) and two axes (parallel and perpendicular to the crankshaft centerline). Acceptable taper is typically under 0.001" per inch of bore diameter. Out-of-round should not exceed 0.0005".
Cylinder Liners and Main Bearing Bore Alignment
If the engine uses wet liners (replaceable cylinder sleeves in direct contact with coolant), check for pitting on the coolant-side surface—cavitation erosion is common in diesel engines with poor coolant maintenance. Dry liners should be checked for proper seating and no evidence of movement or distortion.
Don't overlook main bearing bore alignment. The tunnel that holds the crankshaft must be perfectly concentric. If a block has been overheated or physically dropped, those bores can shift. Run a dial bore gauge through all main bearing saddles to check for misalignment. If the bores aren't concentric within 0.001", the block needs line boring—a step that budget rebuilders sometimes skip, with predictable consequences.

3. Crankshaft and Bearing Inspection
The crankshaft converts linear piston motion into rotational power. It's under immense stress every second the engine runs. If it's been poorly reconditioned, bearing failure follows within thousands of miles—not tens of thousands.
Journal Measurement: Precision Down to Ten-Thousandths
Crankshaft journals—both main journals (where the crank rides in the block) and rod journals (where connecting rods attach)—must be measured with an outside micrometer capable of reading to 0.0001".
Here's what you're looking for:
- Taper: The journal should be the same diameter across its entire width. Maximum allowable taper is 0.001". Anything more means uneven wear, which creates uneven bearing load and accelerated failure.
- Out-of-round: Measure each journal at two points, 90 degrees apart. The difference should be under 0.0005". Egg-shaped journals destroy bearings quickly because the oil wedge cannot form properly.
- Surface finish: The journal should have a smooth, mirror-like finish. Any ridges, scoring, or discoloration—especially blue heat marks—indicates the journal was overheated or damaged and should not have been reused.
Bearing Clearance: The Goldilocks Zone
Bearing clearance—the gap between the journal and the bearing shell—determines whether your oil film can do its job. Too tight, and oil flow is restricted, leading to overheating and seizure. Too loose, and oil pressure drops, causing excessive wear and noisy operation.
The standard range for most engines is 0.001" to 0.003" for main bearings and 0.0015" to 0.0025" for rod bearings. The simplest way to verify clearance is with a Plastigage: lay a strip of the calibrated plastic across the journal, torque the bearing cap to specification (do NOT rotate the crankshaft), then remove the cap and measure the flattened strip's width against the supplied scale on the packaging.
Ready to source engines that come with verified bearing clearance data? Explore our OEM/ODM services for custom specifications and full inspection documentation.
Dynamic Balancing: Not Optional
Here's something many buyers don't think to ask about. When a crankshaft is reground, or when new pistons and rods are installed, the rotating assembly's balance shifts. An unbalanced crankshaft causes vibration that accelerates bearing wear, stresses the block, and can literally shake the engine apart over time.
Quality remanufacturers dynamically balance the entire rotating assembly—crankshaft, pistons, connecting rods, flywheel, and harmonic balancer—to within 0.5 gram-inch or better. Ask for balancing records. If the supplier can't produce them, the crank may have been installed as-is, and you're gambling with long-term durability.
Back to Dave's story for a moment. When his failed engines were torn down, the root cause in three of four cases was bearing failure traced to out-of-spec journal taper and zero dynamic balancing records. The supplier had reground the crankshafts but never rebalanced them. The fourth failure was a cracked block that magnetic particle testing would have caught in five minutes. Dave's $28,000 loss came down to skipping exactly the inspections you're reading about right now.
4. Cylinder Head and Valve Train Assessment
The cylinder head is where combustion happens. It houses the valves, springs, camshaft on overhead-cam engines, and in many modern designs, the fuel injectors and turbocharger mounting hardware. A remanufactured head that looks clean but hasn't been properly reconditioned will leak compression, burn valves, and fail prematurely.
Head Flatness: The 0.003" Rule
A warped cylinder head is a blown head gasket waiting to happen. Thermal cycling—repeated heating and cooling—causes aluminum heads especially to distort over time. Use a precision straightedge and feeler gauge across multiple points on the mating surface, checking both diagonally and longitudinally. The industry standard for acceptable flatness is 0.003" per 6 inches of length for most passenger and light commercial engines.
If the head exceeds that spec, it must be milled flat. But here's the catch: excessive milling changes the combustion chamber volume, raising the compression ratio and potentially causing detonation. A quality remanufacturer measures and documents chamber volume after machining, verifying it stays within OEM tolerances.
Valve Seats and Sealing
Valve seats must be concentric and properly angled (typically 45 degrees) to create a gas-tight seal against the valve face. The standard test is a leak-down test: pressurize each cylinder through the spark plug hole with compressed air (usually 100 psi) and measure the percentage of pressure loss.
- Under 10% leak-down: Excellent sealing
- 10–20%: Acceptable but worth monitoring
- Over 20%: Valve seat or ring problem requiring correction
You can also perform a simple solvent test: pour mineral spirits into the intake and exhaust ports with the valves closed. If any liquid seeps past the valve seat within 30 seconds, the seal is compromised and the seats need regrinding or replacement.
Valve Springs and Camshaft Inspection
Valve springs lose tension over time through heat cycling and material fatigue. Weak springs cause valve float at high RPM, which can lead to piston-to-valve contact—a catastrophic failure. Each spring should be tested with a valve spring tester and compared to OEM specifications. Replace any spring that measures more than 10% below the specified installed load.
For camshaft inspection, measure lobe height at the base circle and the peak of each lobe using a micrometer. Compare to OEM specs—worn lobes mean reduced valve lift, which means reduced airflow and power output. Also check journal diameters for wear. Out-of-spec journals indicate the cam was running in a worn head, which means the bearing surfaces in the head need attention or line boring before reuse.
5. Documentation and Warranty Verification
You've checked the compression, inspected the block, measured the crankshaft, and verified the head. Now comes the checkpoint that most buyers skip—and the one that protects you legally and financially when something goes wrong.
Process Documentation: What Was Actually Replaced?
A quality remanufacturer documents every component that was replaced, machined, or reused. This isn't just good practice; it's your proof that the engine was actually remanufactured, not just cleaned and repainted.
At minimum, the documentation should include:
- Parts replaced: piston rings, bearings, gaskets, seals, timing components, oil pump, freeze plugs
- Machining performed: block bore and hone specifications, crankshaft grind specs, head resurface depth
- Components reused: crankshaft, camshaft, connecting rods (with condition notes and measurement data)
- Testing methods used: compression test results, leak-down test results, NDT crack detection results
If a supplier hands you a one-page "certificate of quality" with no specifics, that's not documentation. That's marketing.
Test Reports: Cold Test and Hot Test
Professional remanufacturers perform two types of final testing:
- Cold Test (Spin Test): The engine is spun by an electric motor without fuel or combustion. Sensors monitor oil pressure, compression, valve timing, and rotational resistance. This catches assembly errors, internal leaks, and timing issues before the engine ever fires.
- Hot Test (Run Test): The engine is started and run under load on a dynamometer. Parameters including oil pressure, coolant temperature, exhaust gas temperature, and power output are recorded and compared to OEM specifications.
Not every remanufacturer hot-tests every engine—some sample-test a percentage of production. Ask what percentage of engines receive full hot testing and request the actual test report for your specific unit. A supplier confident in their engine quality will have no problem providing this.
Warranty and Certification
A 12-month warranty is the industry baseline. Anything shorter is a warning sign. But coverage scope matters as much as duration:
- Parts only: The supplier covers defective components. You pay for labor and shipping.
- Parts and labor: The supplier covers both. This is what you want for fleet and commercial applications.
- Unlimited mileage: No mileage cap on coverage. Preferred for high-use fleet operations.
Conclusion
Identifying a quality remanufactured engine comes down to five checkpoints: compression testing that reveals internal sealing health, block integrity verified through non-destructive testing, crankshaft and bearing measurements held to ten-thousandth-of-an-inch tolerances, cylinder head and valve train assessment that ensures combustion integrity, and documentation that proves every step was done right.
The data is on your side. Remanufactured engines save 30 to 50 percent versus new, reduce waste by up to 85 percent according to the Automotive Parts Remanufacturers Association, and carry failure rates as low as 5 percent over three years when properly built. But those numbers only apply when you do your due diligence. A supplier who can't produce compression data, NDT reports, bearing clearance measurements, or a comprehensive warranty isn't selling you a remanufactured engine—they're selling you a gamble.
Take the next step. Fuchuan Engine delivers remanufactured engines built to OEM specifications, with full inspection documentation, ISO-certified processes, and comprehensive warranty coverage on every unit. Whether you're sourcing a single replacement or scaling a fleet program, our engines are tested, documented, and ready to perform. Start browsing our engine catalog → and see the difference that real quality makes.

Toyota GR vs BMW B58: A Technical Deep-Dive into Two Modern Six-Cylinder Engine Families
Toyota V6 SUV Platform and the AE86 Legend: A 30-Year Naturally Aspirated Legacy
Related Article